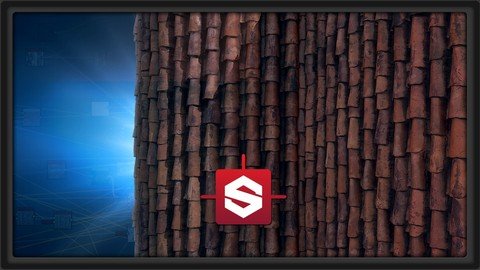
Create A Realistic Roof Shader With Substance Designer
- 27.08.2022
- 91
Last updated 12/2017
MP4 | Video: h264, 1280x720 | Audio: AAC, 44.1 KHz
Language: English | Size: 1.95 GB | Duration: 4h 24m
Use this powerful software to create believable shaders and materials for games and film!
What you'll learn
Use basic damage sculpting in ZBrush
Set up a tileable texture in 3ds Max
Bake in Marmoset Toolbag 3
Use texture creation in Substance Designer
Render in Marmoset Toolbag 3
Requirements
Knowledge of Substance Designer
Access to Marmoset Toolbag 3
Access to 3ds Max
Access to ZBrush
Description
In this Roof Shader in Substance tutorial we will go over on how to create a roof texture using 3ds Max, ZBrush and Substance Designer. We will first create our low poly tiles in 3ds Max, after that we will go into ZBrush and sculpt a few variations of our tiles, before adding some nice damage and then optimizing it so that we can export it back to 3ds Max. We will then setup our texture so that it will tile perfectly and so that it has a lot of variation in size, rotation, and shape. We will also make everything ready for baking like assigning different materials for the color map. Once that is all done we will set up a baker scene in Marmoset Toolbag 3 and bake out all our texture maps using their new baker. When all the baked maps look good we will then move into Substance Designer where we will start creating our final texture maps. We will first improve the normal map with smaller details and then create our final albedo, roughness, and metallic map. We will wrap things up with a final polish over the entire texture and render the final texture in Marmoset Toolbag 3.
More about the Instructor
Emiel Sleegers is 20 years old, originally from The Netherlands but currently living in the UK. He's a 3D environment artist working in the game industry. He's worked for companies like Playground Games and ubisoft with so far one announced title on his name: Forza Horizon 3, and another title on the way. He's a self taught artist who one day, 4 years ago, decided he wanted to know how the amazing games he always played were made. The rest is history.
Overview
Section 1: Modeling and Optimizing the Roof Tiles
Lecture 1 Download Source files here!
Lecture 2 Introduction
Lecture 3 Reference and Creating the Low Poly
Lecture 4 Sculpting Damaged Tiles
Lecture 5 Finish Sculpting and Tile Optimization
Lecture 6 Finish Tile Optimization
Lecture 7 Setting up the Texture in 3DS Max
Section 2: Texturing and Baking our Maps
Lecture 8 Introduction
Lecture 9 Continue the Texture in 3DS Max
Lecture 10 Adding Variation to the Tiles
Lecture 11 Finish Setting up the Texture in 3DS Max
Lecture 12 Prepare for Baking
Lecture 13 Baking the Textures in Marmoset Toolbag 3
Section 3: Rendering Maps and Building our Shader
Lecture 14 Introduction
Lecture 15 Set up a Project in Substance Designer
Lecture 16 Start Creating the Normal Map
Lecture 17 Finish Creating the Normal Map
Lecture 18 Start Creating the Base of the Albedo
Lecture 19 Adding Base Dirt to the Albedo
Lecture 20 Finishing Up Most of the Dirt in the Albedo
Lecture 21 Applying Dirt to Normal and Roughness
Lecture 22 Final Polish
Lecture 23 Bonus Lecture: Further Learning with 3dmotive
People who have a basic understanding of Substance Designer and the PBR texturing workflow.,People who want a more in-depth knowledge of texture creation in Substance Designer.
Homepage
https://www.udemy.com/course/3dmotive-create-a-realistic-roof-shader-with-substance-designer/Download ( Rapidgator )
DOWNLOAD FROM RAPIDGATOR.NET
DOWNLOAD FROM RAPIDGATOR.NET
DOWNLOAD FROM RAPIDGATOR.NET
Download (Uploadgig)
DOWNLOAD FROM UPLOADGIG.COM
DOWNLOAD FROM UPLOADGIG.COM
DOWNLOAD FROM UPLOADGIG.COM
Download ( NitroFlare )
DOWNLOAD FROM NITROFLARE.COM
DOWNLOAD FROM NITROFLARE.COM
DOWNLOAD FROM NITROFLARE.COM
Please Help Me Click Connect Icon Below Here and Share News to Social Network | Thanks you !